So, you have just purchased some awesome new fish for your already established tank and subsequent fish community, but these fish are used to different pH levels, water temperature, and salinity parameters than what your tank currently has.
However, you want the new fish to live a life as happy and as healthy as they possibly can. That is where acclimatization comes into play. If you can get the acclimation process right for your new arrivals, they will live a healthy life and settle in quickly to their new environment.
To properly acclimatize your new fish to your current tank is no walk in the park. It requires patience and time. The majority of fish, including invertebrates and corals are extremely sensitive to even the most subtle changes to their environment, and more specifically parameters, meaning that proper acclimation is required to ensure they successfully relocate to your aquarium.

There is more than one acclimation method for fish; however, there are two main processes that people tend to use and they are explained in detail below. It is incredibly vital that you do not rush the acclimation process. It is such an important procedure, and there are rather large consequences if you do not perform the acclimation properly. Something else to keep in mind is that your aquarium lights must be switched off for a minimum of 4 hours after the fish, critter, or coral has been introduced to your tank, helping them adjust quicker.
A recommendation that has been adopted by many experienced hobbyists (including us) is to quarantine new fish and other aquatic species before introducing them to your community. This is to prevent potential diseases and parasites from entering your aquarium and potentially infecting some of your more disease-prone community members. Not only this, but you can get a gauge as to what foods they like, what are the best feeding times for them, general behavior patterns, and to ensure they are 100% healthy before adding them to your aquarium.
How To Float Acclimate Fish
There are two main methods for acclimating fish: the drip acclimation method, and the floating method. First of all, let’s go through the less popular acclimation process – the Floating Method.
First, you must turn off your aquarium lights, and then dim the lights in the room too. Once this step has been completed you will open the box your new arrivals have come in. The reason for keeping the lights dimmed is because fish are incredibly sensitive to light, and if they experience a sudden change of lighting (from literally pitch black to bright lights) they can easily become traumatized.
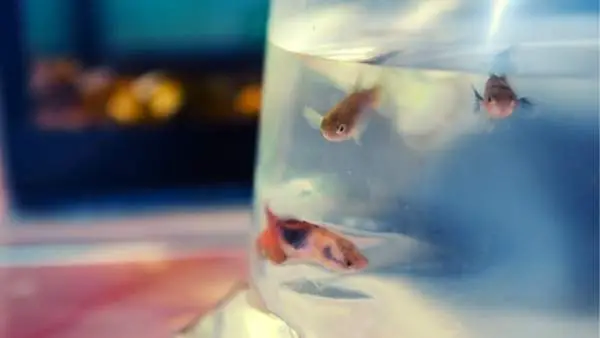
Once you have taken the fish bag out of the box with your new fish inside, float the sealed bag in your aquarium for 15 minutes. The reason for this method of acclimation is to allow the water in the fish bag to adjust at a slow rate to the temperature in your tank whilst maintaining high levels of dissolved oxygen.

After completing this process for 15 minutes, cut a hole in the bag, just underneath the metal clip. Once you have done this proceed to roll the top edge of the bag down by one inch which will create somewhat of an air pocket within the lip area of the fish bag, enabling the bag to float on the surface of your aquarium. Now you will want to add half a cup of your aquarium water to the fish bag, repeat this process every 4 minutes until the fish bag is completely full of your aquarium water. Next you will want to lift the bag from your tank and discard half of the water in the bag, then float the bag in your aquarium again, adding half a cup of your tanks water to the bag every 4 minutes until the bag is full like before.
Once this step has been completed, you will want to catch your new community member with a net from the bag and release it into your aquarium. Remove the fish bag from the aquarium and remove all the water inside it – it is important that you never release fish bag water directly into your aquarium!
How To Drip Acclimate Fish
This next method is considered to be more advanced, however, it is certainly the more commonly practiced and popular method out of the two. There is certainly more equipment required with this method – you will need airline tubing, a 3–5-gallon bucket, and something to wedge between the bucket to keep it held in a certain position. The best thing about this method is that you can acclimatize more than one new inhabitant at once, although fish and invertebrates are recommended to be kept apart from one another (in separate buckets) during this process.
Once you have acquired the right equipment, empty the fish bag (including the water and fish) into the bucket – make sure you are not exposing sensitive invertebrates to the air. The bucket may need to be tilted on a 45-degree angle, depending on the amount of water in each fish bag to make sure that the animals are completely submerged (using a prop wedge for this task is a good idea).
Using airline tubing, you will next have to set up and then run a siphon drip line from your aquarium tank to each of your acclimation buckets. You must tie several loose knots in the tubing or use something non-metal to create an airline control valve, which will help regulate flow from the aquarium. Securing the airline tubing by using an airline holder is a good idea too and strongly recommended. However, there are several acclimation kits that can easily be acquired online or in most stores, which certainly makes the process easier.
So, start off by sucking on the end of the airline tubing that you will be placing in each of the buckets. Once the water starts flowing through the tubing, adjust the drip by tightening one of the knots, or even by adjusting the control valve to a rate of 2 to 4 drips per second. Once the amount of water in the bucket doubles, discard half of this water and begin the drip process again until the water volume doubles once again (usually around an hour).
Now you are ready to transfer the creatures into your aquarium. Sponges, clams, and gorgonians should never be exposed to air, if they do there will likely be serious consequences for these critters. Gently scoop them out of the bucket with the bag, making sure that they are completely covered in water, then completely place the bag underwater by twisting the opening, and then remove the bag from the aquarium tank.

Now discard both the bag and the excess enclosed water. A small amount of the diluted water may escape into your aquarium water, which is okay, and there is no need to panic. Something else to note is that when you are transferring coral, never touch or handle the flesh-like part – most invertebrates and corals are a lot more sensitive than fish are to specific changes in gravity. Acclimating invertebrates and corals to a gravity level ranging between 1.023 – 1.025 is so important, severe stress or trauma may be a consequence if this has not been done.
Additional Acclimation Tips
- It is so important that you remain patient through this process, making sure you do not rush the acclimation procedure. The majority of new fish and invertebrates take an hour or less to complete their acclimation.
- If your fish appears to be dead, you must still follow and complete the process. Strangely enough, some newly purchased fish and critters may appear dead, but they will in fact, revive once the acclimatization process is complete.
- Make sure you keep your aquarium lights off for a minimum of 4 hours after the new arrival is introduced to your aquarium.
- It is never recommended to place an air stone into the fish bag when acclimating your aquarium’s latest arrival. It will almost definitely increase the pH level of the shipping water way too fast, and your new arrival could be potentially exposed to lethal ammonia.
- The majority of corals and invertebrates are more sensitive than fish to salinity changes, which is why it is so crucial that you acclimate them to the specific gravity levels mentioned above (1.023 – 1.025).
- Once your new inhabitant has been introduced to your tank it will likely be chased around by one of, if not all of your existing community – this will stop after a few minutes of settling in. However, if this does not stop and your new fish or critter is continuing to be harassed by a tank bully then follow either of these options.
Option 1: Anything that can act as almost a floating basket will be great to use for containing your tank bully. Float the basket at the top of your aquarium with the tank bully inside, making sure that they can’t escape. It is so important you keep the bully in there and not your new arrival, as the fish must get used to your aquarium and their new surroundings. It is advised to keep the bully in the basket for a minimum of 4 hours.

Option 2: The second method is to purchase a perforated plastic lighting grid, which can be found at your local hardware store, to cut down the width of your aquarium temporarily. This grid can then be used to section off small portions of your aquarium to then separate the aggressive bully from the new arrival. Once your new fish adjusts to the tank, you can then introduce the aggressive one back in.
Conclusion
In conclusion, the acclimation process is certainly no cake-walk, and when done properly and safely for your new arrival, it will take time. You need an abundance of patience and time to do this properly. Remember, you only have one shot at this, and if you do not follow the steps provided, it could be detrimental to your new arrival. Good luck!
